SELECT PRICE
All Results
£0 - £10
£10 - £25
£25 - £50
£50 - £100
£100 - £250
£250 - £500
£500+
SELECT BRAND
All Results
Adventure Medical
Backpackinglight.co.uk
BCB
Care Plus
Cicerone Press
Clam Cleats
Cocoon
Coghlans
DD Hammocks
Drink Safe Systems
Exped
Gear Aid
Gehwol
Giraffe
GSI
Hammaro
Helinox
HydraPak
Integral Designs (RAB)
Katadyn
Leki
Lifeventure
Loksak
Luxe Outdoor
mKettle
Montane
Mountain King
MPowerd
MSR
Nalgene
OMM
Optimus
Ortlieb
Platypus
Pod Sacks
Primus
RAB
Rab
Sawyer Filters
Sea To Summit
Solo Stove
Strike Fire
Thatchreed
Thermarest
Thermartex
Toaks
Trangia
Trekmates
UCO
Vargo
Zebra
Home
>
Equipment
>
Shelters
>
Shelters / Hammocks
Shelters / Hammocks
Page 1 of 2:
23 Items
Sort by: Name
Sort by: Newest
Sort by: Price Asc
Sort by: Price Desc
Sort by: Top Sellers
1
2
Show All Products
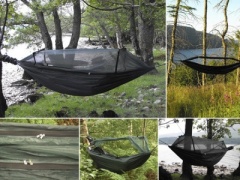
DD Frontline Hammock
£49.99
£39.99
Add to Basket
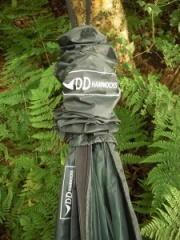
DD Hammock Sleeve
£8.99
£7.19
Add to Basket
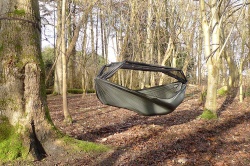
DD Superlight Frontline Hammock
£93.99
£75.19
Add to Basket
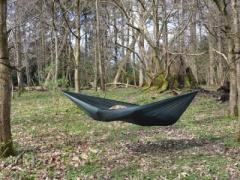
DD Superlight Hammock
£51.99
£41.59
On Order
DD Superlight Mosquito Net
£27.99
£22.39
Add to Basket
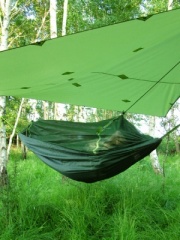
DD Travel Hammock / Ground Nest
£51.99
£41.59
Add to Basket
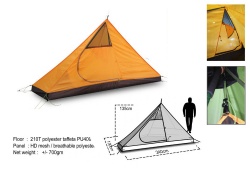
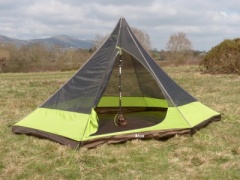
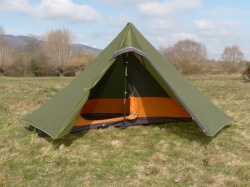
F6e Winter Solo Inner
£99.99
£79.99
Add to Basket
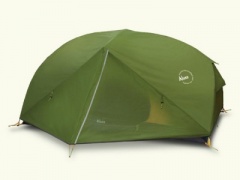
Firefly SL
£225.99
£159.99
Add to Basket
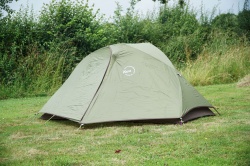
Habitat NX3
£219.99
£151.99
On Order
Hex Peak Double Inner (F4)
£119.99
£83.99
On Order
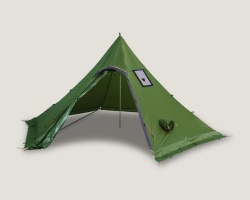
Hex Peak F6A
£299.99
£223.99
Add to Basket
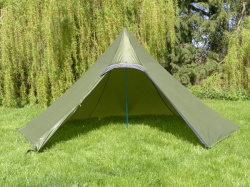
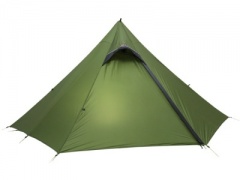
Hex Peak F6A (Fly Only)
£229.99
£159.99
Add to Basket
Hex Peak F6ES (Hot Tent)
£309.99
£247.99
Add to Basket
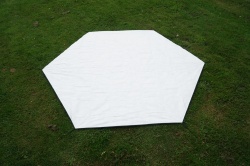
Hex Peak Tyvek V4/F6/F8 Footprint
£59.99
£39.99
Add to Basket
Hex Peak V4A
£249.99
£183.99
Add to Basket
Hex Peak V4A Fly Only
£154.99
£115.99
On Order
1
2
Show All Products
Page 1 of 2:
23 Items
Sort by: Name
Sort by: Newest
Sort by: Price Asc
Sort by: Price Desc
Sort by: Top Sellers
Tel: +44 (0) 7516 431472
Home
About Us
Contact Us
Our Blog
Podcasts and Videos
What Customers Say
Visit Us
Blog
Shop
Accessories
Personal
Practical
Bookshelf
Bushcraft
Camp Comfort
Cooking
Accessories
Cookers and Stoves
Pots, Pans and Mugs
Wood Burning Stoves
Food Preparation
Head Gear
Hi-Tech and Solar
Hydration
Lighting
Repairs and MYOG
Rucksacks
Pack Accessories
Less than 30 Litres
30 to 50 Litres
50 Litres Plus
Safety and First Aid
Shelters and Tents
Shelter Accessories
Tarps and Bivy Bags
Shelters / Hammocks
Shelters 3+
Hot Tents
Sleeping
Sleeping Bags/Quilts
Sleeping Pads & Acc
Walking Poles
Promotions
B-Stock
Current Promotions
Gift Vouchers
Knowledge Base
Cycle Touring
Duke of Edinburgh
Footwear Care and Repair
Going Lightweight
Heat Loss
Hills Defined
Hypothermia
Layering System
Luxe Outdoor Products
Outdoor Links
Outdoor Toilet
Rucksack Tips
Seam Sealing
Sleeping Bag Insulation
Travellers Tips
Wood As Fuel
Walking Poles
Wind Chill
Wind Force
Waterproofing Your Gear
Customer FAQ
Customer Features
Customer Reviews
Customer Support
Environmental Policy
Loyalty Scheme
Newsletter
Notify Me
Wish list
Contact Us
Delivery
How To Order
Privacy Policy
Quote Request
Returns Policy
Terms and Conditions
Visit Us
Podcasts and Videos
View Basket
|
Wish List
|
New Account
|
Sign In